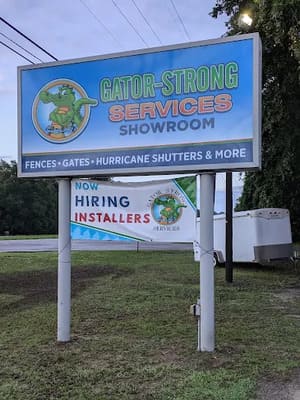
South Carolina

3835 Socastee Blvd
Myrtle Beach, SC 29588
(843) 650-8480
Office@Gator-Strong.Com

Gator
Strong
Services

North Carolina

6960 Carolina Beach Rd
Wilmington, NC 28412
(910) 520-3297
Office@Gator-Strong.Com

Proudly Supporting Residential, Commercial, and Builder Projects across the Carolinas.

The Ultimate Guide to Gate Installation: Secure Your Property in Style

A well-chosen and installed gate adds a touch of elegance, security, and privacy to your property. Whether you’re securing a residential driveway or a commercial entrance, choosing the right type and navigating the gate installation process can seem daunting. This comprehensive guide will equip you with the knowledge and steps necessary for a successful gate installation, ensuring your property’s safety and enhancing its aesthetics.

Step 1: Planning and Preparation

1. Define Your Needs and Goals:

  • Security: Is enhanced security your primary concern? Consider sturdy materials like wrought iron or steel.
  • Privacy: Do you desire complete privacy or visual separation? Opt for solid panels or opaque materials.
  • Aesthetics: Does the gate need to complement your property’s style? Explore various materials and designs.
  • Functionality: How will the gate be used? Consider swing or sliding options based on space and clearance.

2. Research and Choose Your Gate:

  • Gate Types: Explore various options like swing, sliding, cantilever, and automated gates. Each offers advantages suited to specific needs and landscapes.
  • Materials: Choose materials that match your budget, desired aesthetics, and local climate. Popular options include wood, wrought iron, steel, vinyl, and aluminum.
  • Automation: Consider automatic operation for added convenience and security, especially for frequent usage.

3. Check Local Regulations and Permits:

  • Contact your local building department to verify any permits or approvals required for gate installation.
  • Homeowner associations might have specific design guidelines or restrictions; ensure your chosen gate adheres to them.

Step 2: Site Preparation and Installation

1. Site Preparation:

  • Clear the designated area: Remove any obstacles like debris, vegetation, or uneven surfaces.
  • Measure and mark the gate location: Ensure accurate measurements and mark the post locations according to the gate’s size and swing/slide path.
  • Level the ground (if necessary): Create a flat and stable base for post installation.

2. Post Installation:

  • Dig holes for the gate posts: Refer to the manufacturer’s instructions or consult a professional for proper depth and spacing.
  • Secure the posts in concrete footings: Use pre-mixed concrete or consult a professional for proper mixing and pouring techniques.
  • Allow the concrete to cure completely: Follow the manufacturer’s recommended curing time before proceeding.

3. Gate Frame and Panel Installation:

  • Assemble the gate frame: Follow the manufacturer’s instructions and ensure all components fit securely.
  • Attach the gate frame to the posts: Utilize appropriate hardware like bolts and brackets for a sturdy connection.
  • Hang the gate panels or infills: Ensure proper alignment and secure them according to the chosen material and design.

4. Hardware Installation:

  • Install hinges, rollers, tracks, or wheels depending on the chosen gate type and automation system.
  • Mount the gate opener and control system (if applicable): Follow the manufacturer’s instructions for proper installation and wiring.

5. Testing and Adjustments:

  • Manually operate the gate: Ensure smooth movement and proper clearance throughout the entire opening and closing range.
  • Test the automatic gate opener (if applicable): Verify proper functionality, safety features, and adjust settings if necessary.

Step 3: Maintenance and Safety Tips

  • Regularly inspect the gate and hardware: Look for signs of wear and tear, loose connections, or rust, addressing any issues promptly.
  • Lubricate moving parts: Use recommended lubricants to ensure smooth operation and prevent premature wear.
  • Clean the gate regularly: Remove dirt, debris, and build-up to maintain the gate’s appearance and prevent damage.
  • Ensure proper drainage: Avoid water accumulation around the gate posts to prevent foundation erosion.
  • Invest in safety features: Consider adding safety sensors, warning lights, and emergency release mechanisms for automatic gates.

Conclusion

Installing a gate is a relatively straightforward process, but there are several crucial steps to follow. First, you need to choose the right gate for your needs, considering factors like size, privacy, and material. Next, prepare the ground by digging holes for the posts and ensuring they are level. Then, assemble the gate frame according to the manufacturer’s instructions.

Afterward, insert the posts into the holes and secure them with concrete. Furthermore, hang the gate on the frame and ensure it swings freely. Equally important, check that all the hardware is tight and secure. Finally, check the gate for proper operation and make any necessary adjustments. In addition to these steps, you may also want to consider aesthetics and choose a gate design that complements your property. Remember, consulting a professional for gate installation, especially for complex projects, can help ensure a secure and functional outcome.

Frequently Asked Questions (FAQs)

Q: How much does gate installation cost?

A: The cost varies depending on factors like gate size, material, automation, and professional installation. Expect a range of $500 to $5,000 or more.

Q: Can I install the gate myself?

A: While some basic gate installations might be DIY-friendly, complex projects involving concrete work, automation, or heavy materials are best left to professionals for safety and proper execution.

Q: What are the best materials for gates?

A: Wrought iron offers classic aesthetics and durability, but requires more maintenance. Steel is strong and budget-friendly, but prone to rust without proper coating. Wood provides warmth and can be customized, but needs regular sealing. Vinyl and aluminum offer low maintenance and various styles, but might not be as strong as other options.

Q: How often should I maintain my gate?

A: Conduct a visual inspection monthly and lubricate moving parts every 3-6 months. Deep cleaning and professional maintenance may be required every 1-2 years.

Q: What are some additional considerations for automatic gates?

A: Ensure the chosen system has adequate power supply and consider backup power options in case of outages. Regularly check the battery life of wireless remotes and replace them as needed.

By understanding your needs, carefully planning, and following these guidelines, you can ensure a successful and secure gate installation. Remember, prioritizing safety and consulting a professional when necessary will contribute to a long-lasting and functional addition to your property.